

Guide
Kids Climbers Playground: A Setup and Safety Guide for Toddlers
Oct
Kids Climbers Playground: A Setup and Safety Guide for Toddlers
A kids climbers playground is a freestanding play structure for children roughly 1 to 6 years old that combines a short slide, a climbing wall or molded steps, and a platform a toddler can top out on alone. Most stand 3 to 4 feet tall and fit on a patio or in a playroom.
That is the tidy definition. Here is the part most buying guides skip: the reason you are probably reading this is that your living room has quietly become a climbing gym with worse padding. The coffee table, the couch, the windowsill. Your kid has solved all three and is now looking for a bigger challenge.
We bought our first mini climber for exactly that reason. It lasted four years, two children, and one move, and it is still the piece of toddler gear I recommend most often. But I have also watched parents spend $400 on a structure their two-year-old was scared of, and I have watched a climber tip backward on a sloped patio because nobody checked the footing. The difference between those stories is almost never the price tag. It is whether the buyer matched the climber to the child and the yard before checkout.
This guide covers what actually counts as a kids climbers playground, how the main types differ, what the safety standards really require, and the setup steps that keep the thing stable through a full season of abuse.
What Counts as a Kids Climbers Playground
The phrase gets used loosely online. Retailers slap it on everything from a 3-in-1 slide set to a two-story playhouse with a tunnel, so it helps to sort the category by what a toddler can actually do on it.
A true kids climbers playground has three working parts: a way up, a way to stand, and a way down. The way up is molded steps, a ladder, or a climbing wall with handholds. The platform has to be wide enough for a toddler to turn around on, because turning around is the hard part for a 2-year-old. The way down is a gentle slide, usually around 3 feet long with a slope shallow enough that feet-first is the only natural option.
Anything missing one of those parts is a toy, not a climber. A standalone slide is a slide. A foam block set is soft play, and it belongs indoors. Neither is a problem, they just do a different job, and paying climber prices for one of them is how parents end up disappointed.
Why These Structures Earn Their Footprint
Climbing is not just energy release, although it is excellent for that. Pediatric therapists and early childhood educators point to climbing as one of the most efficient whole-body activities for children under five, because it loads the same systems at once: grip strength, core stability, balance, and the spatial judgment that tells a child how far off the ground they are.
The sequencing matters too. A toddler who learns to climb up, stop, turn around, sit, and slide has practiced a five-step motor plan in order. That is the same skill set behind putting on shoes and using stairs without holding a rail.
There is a practical household benefit that rarely makes it into the research papers. A climber gives a toddler a place where going up and down repeatedly is the point. Forty trips up the same three steps is exactly the intended use, and it beats redirecting the same forty trips away from your bookshelf.
Step2, Little Tikes, and Simplay3 have all built their toddler lines around that idea, which is why their climbers are low, chunky, and deliberately repetitive.
The Main Types Compared
Freestanding Mini Climbers
These sit at the entry point. The Little Tikes Hide and Seek Climber is the standard-bearer here, rated for ages 1 to 4 at around $100 list price, with molded steps and a single gentle slope. The footprint is small enough for a corner of a playroom, and the low platform height means most 18-month-olds can manage it with a hand nearby. This is the right first climber for most families.
All-in-One Climber Playsets
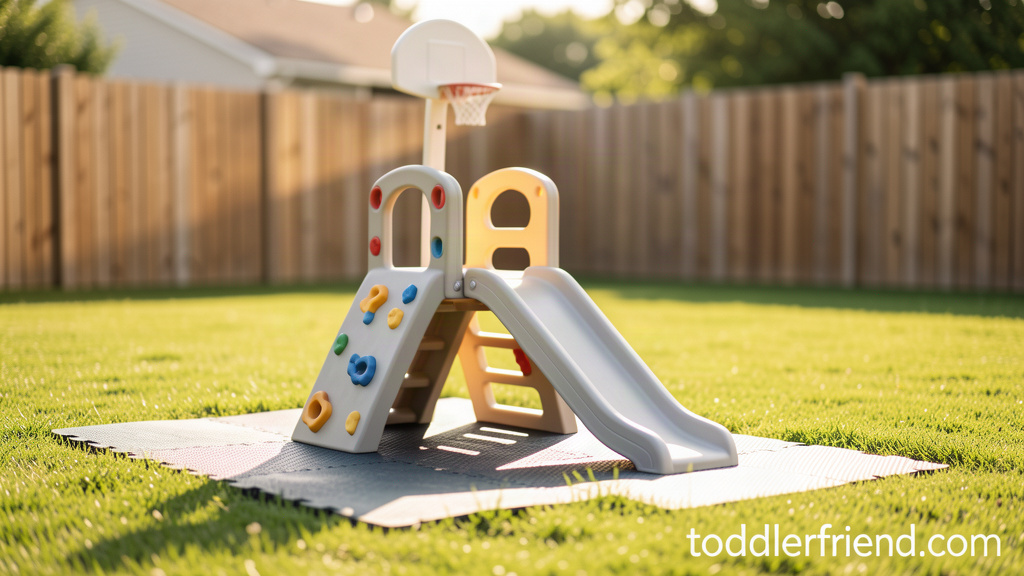
This is the category the keyword really describes. The Step2 Game Time Sports Climber is the clearest example: it measures about 30.5 by 62 by 42.5 inches assembled, is rated for ages 2 to 6, and holds up to 60 pounds per child with a 180-pound total limit. You get a slide with a ladder, a climbing wall, a basketball hoop, and a crawl space underneath that doubles as a soccer goal. At roughly $118 it costs about as much as two filled sandboxes but replaces a lot of separate toys.
Climber and Swing Combos
These add a third activity. The Little Tikes Hide and Seek Climber and Swing is 53.5 by 52 by 41 inches and weighs 34 pounds, with a 19.75-inch slide, an 18-inch platform, a 12.5-inch climbing wall, and a swing seat 8 inches off the ground that comes with a three-point harness. It is rated for three children at up to 45 pounds each. If you have a toddler and a preschooler, or two toddlers close in age, this layout cuts down on turn-taking fights.
Climbing Domes
These are the outdoor big sibling. Geometric steel domes give older toddlers and preschoolers a structure they can scale from any side, but the recommended starting age is generally 3 and up, and the smaller 13-foot models still need real clearance. They are worth it later, not first.
Foam and Soft-Play Sets
These are indoor-only, and that is a feature. Foam climbing blocks and ball pits let a 1-year-old practice climbing onto and off low shapes with almost no fall risk. They will not survive a backyard season, but they bridge the gap before a child is ready for a plastic climber.
Wooden Climbing Frames
These are the long-term buy. Expect $250 to $500 for a solid-wood indoor frame, and expect better stability and appearance than molded plastic. The trade-off is assembly time, weight, and a surface that will show every crayon mark.
Safety Standards Behind the Wording on the Box
This is the section worth reading twice, because the standard language on a product page sounds reassuring and is easy to misread.
Home playground equipment in the United States is covered by ASTM F1148, and surfacing is covered separately by ASTM F1292, which sets a 200 G maximum deceleration and a Head Injury Criterion of 1,000. Those two numbers are the reason a thick rubber mat performs differently from bare grass even though both feel soft underfoot.
The Consumer Product Safety Commission has also measured how these injuries actually happen. In its study of playground equipment injuries, falls accounted for about 81 percent of the injuries on home playground equipment. Almost every one of those was a fall to a surface, which is why the surfacing rules matter more than the sticker price.
The Consumer Product Safety Commission handbook for home playgrounds is the practical companion. The rules that apply directly to a climber of this size are:
- Keep a 6-foot use zone in every direction from the structure and from any obstacle like a fence, tree, or grill, and run protective surfacing at least 6 feet beyond the perimeter. On a slide, that zone extends out from the exit.
- Loose-fill surfacing needs 9 inches of depth for equipment up to 8 feet high, with a 6-inch minimum under 4 feet. Wood chips, shredded rubber, and engineered wood fiber all qualify. Grass and dirt do not, no matter how thick the lawn looks.
- Check openings for entrapment. A gap that lets a child’s body through but traps the head is the danger, which is why the guidance flags openings between roughly 3.5 and 9 inches.
Be wary of any listing that promises a structure your child cannot get hurt on. The accurate claim is that a product meets CPSC and ASTM standards, uses non-toxic and BPA-free materials, and has rounded edges and no exposed hardware. Those are the phrases worth trusting.
What to Check Before You Buy
Age and weight limits come first, and they should match the youngest child who will use it, not the oldest. A climber rated for ages 2 to 6 with a 60-pound per-child limit is a poor fit for a 15-month-old, who needs lower steps and a shorter drop to the ground.
Stability comes second. Wide bases and molded feet beat narrow ones, and molded-in footings that spread the load are better than thin legs. If a listing shows a narrow footprint and a tall platform, skip it for a toddler.
Then check the plastic itself. High-density polyethylene with UV stabilization holds color and resists cracking; thin, glossy shells that flex under a hand press do not. Non-toxic and BPA-free formulations matter more here than on almost any other toddler purchase, because children put their mouths and hands on every surface of a climber.
Third-party testing and assembly hardware round out the list. Look for a stated ASTM F1148 conformance, stainless or coated hardware, and a manual that is actually illustrated. A climbing structure is only as stable as the bolts holding it together.
Where to Put It
Placement decides how safe a climber is more than the climber does. Flat, level ground is non-negotiable. A slope of even a few degrees changes how the structure loads, and a unit that is stable on a patio can rock on a lawn that looks flat.
Give the slide a clear run-out. Grass is fine as a landing surface at this height when the slide exit is low, but a rubber mat or a patch of wood chips under the exit is better and costs very little. Keep the climber away from window wells, air conditioning units, tree roots, and anything a child could use to climb higher than intended.
Indoors, put it against a wall on a rug, not in a walkway, and not within reach of a bookshelf or a stair rail. The climber should be the highest thing a child can get to in that room.
Setup in Five Steps
- Pick the spot first, and confirm the 6-foot use zone is actually clear in every direction before you unpack anything.
- Prep the surface. Level it, then add the landing material under the slide exit.
- Assemble on a soft surface like a blanket or cardboard, follow the illustrated manual in order, and tighten every bolt fully. Do not stop halfway and finish tomorrow, because half-assembled climbers are the ones that collapse.
- Test it with your own weight before your child gets on. Push sideways on the platform, press down on the slide, and check that nothing rocks or flexes.
- Set the rules out loud. Feet first, one at a time, hands on the rails, and an adult within arm’s reach for the first few weeks. Then stay close until you have watched your child do it twenty times without a wobble.
Keeping It Safe Through the Season
Re-tighten the hardware after the first two weeks, then monthly. Vibration from climbing loosens fasteners in a way that is invisible until it matters.
Wash the plastic with mild soap and water, and skip bleach on printed graphics. Check monthly for hairline cracks around bolt holes, which is where plastic climbers usually fail first. If you live somewhere that freezes, bring molded plastic indoors for the winter, since cold makes it brittle and a single hard landing can crack a step.
Replace any missing or cracked part rather than improvising. Manufacturers sell replacement hardware and steps for exactly this reason, and a mismatched bolt is a real risk on a structure your child trusts with their full weight.
What I Recommend for Most Families
The Step2 Game Time Sports Climber is the best single answer for a toddler who needs somewhere to climb. It covers ages 2 to 6, includes a slide, a climbing wall, a hoop, and a crawl space, holds up to 60 pounds per child, and assembles in about an hour with two people. You can check the current price and details here: Step2 Game Time Sports Climber on Amazon.
If your child is closer to 1 than 2, start with the Little Tikes Hide and Seek Climber instead and move up in a year or two. If you have two toddlers, the climber-and-swing combo earns its extra footprint.
For more context on how these fit into a bigger play setup, our guide to outdoor climbing toys for toddlers walks through the wider category, and we compare indoor foam sets against wooden climbing frames in our safety breakdown. If you are still mapping out the yard, the outdoor play equipment category is a good place to see the full range.
A Few Mistakes Worth Avoiding
Buying for the child you will have in three years is the most common one. Climbers are cheap enough that a two-stage purchase usually beats one oversized structure that sits unused because it is too tall.
Skipping the use zone is the second. A climber wedged between a fence and a grill has a use zone of about a foot, and that is where the injury happens.
Placing it on concrete without a landing mat, putting it together without fully torquing the hardware, and leaving molded plastic outdoors through a hard freeze round out the list. None of those are exotic failures. They are the ordinary ones.
The Bottom Line
A kids climbers playground is one of the few toddler purchases that gets used hard, every day, for years. Match the platform height and weight limit to your youngest child, keep six feet of clear space around it, put a landing surface under the slide, and re-tighten the bolts once a month. Do those four things and it will outlast the phase it was bought for.
{ “@context”: “https://schema.org”, “@type”: “HowTo”, “name”: “How to Choose and Set Up a Kids Climbers Playground”, “description”: “A step-by-step guide to selecting a safe toddler climber and setting it up so it stays stable through the season.”, “totalTime”: “PT1H”, “step”: [ {“@type”: “HowToStep”, “position”: 1, “name”: “Match the climber to your youngest child”, “text”: “Check the age rating and per-child weight limit against the youngest child who will use the structure. A climber rated for ages 2 to 6 and 60 pounds per child is too tall for a 15-month-old, who needs lower steps and a shorter drop to the ground.”}, {“@type”: “HowToStep”, “position”: 2, “name”: “Confirm the 6-foot use zone”, “text”: “Before unpacking, verify that a 6-foot clear zone extends in every direction from the structure and from any obstacle such as a fence, tree, or grill, with protective surfacing running at least 6 feet beyond the perimeter.”}, {“@type”: “HowToStep”, “position”: 3, “name”: “Prep a level surface and landing material”, “text”: “Set the climber on flat, level ground, because a slope of even a few degrees lets a stable unit rock. Add loose-fill surfacing such as wood chips or shredded rubber under the slide exit; grass and dirt do not qualify as protective surfacing.”}, {“@type”: “HowToStep”, “position”: 4, “name”: “Assemble fully and tighten every bolt”, “text”: “Assemble on a soft surface like a blanket, follow the illustrated manual in order, and fully torque every fastener. Half-finished assemblies are the ones that collapse, so do not pause partway and finish the next day.”}, {“@type”: “HowToStep”, “position”: 5, “name”: “Load-test the structure yourself”, “text”: “Before your child uses it, push sideways on the platform and press down on the slide to confirm nothing rocks or flexes. Then set the rules out loud: feet first, one child at a time, hands on the rails, and an adult within arm reach.”}, {“@type”: “HowToStep”, “position”: 6, “name”: “Inspect and re-tighten monthly”, “text”: “Re-tighten all hardware two weeks after assembly and then monthly, wash plastic with mild soap and water, check for hairline cracks around bolt holes, and store molded plastic indoors if your area freezes.”} ] }